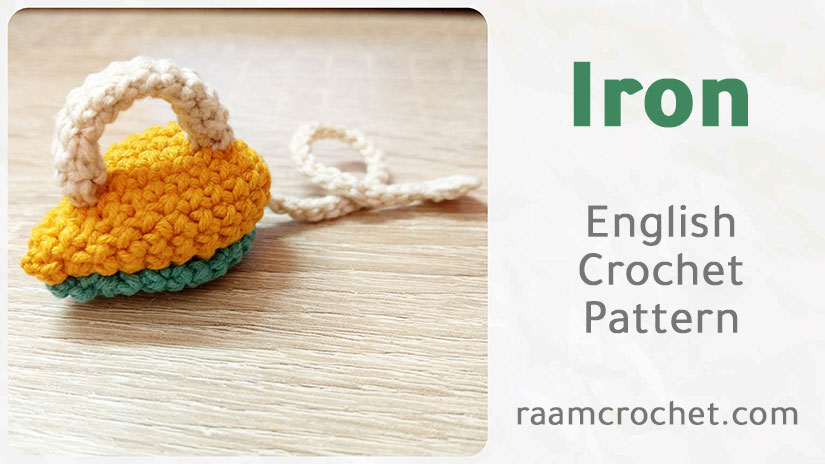
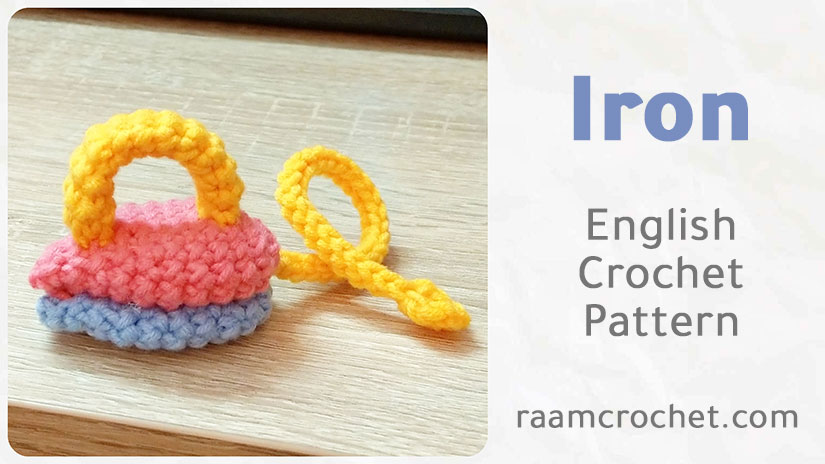
Very easy and cute amigurumi iron that can be added to your mini collection of amigurumi. It has four parts and easy to assemble.
Designer: Nada
Skill level: Easy
Size: Free
Materials
Any kind of yarn suitable for amigurumi with suitable crochet hook
You need three or four colors of your choice
Needle
Stuffing
Terms
MR – Magic ring
st – stitch
sl st – slip stitch
ch – chain
sc – single crochet
dc – double crochet
sc2tog – 2 single crochet together
C st – cluster stitch (2 dc cluster)
Notes
I used the cross single crochet but it’s not necessary.
Crochet Amigurumi Iron
Directions
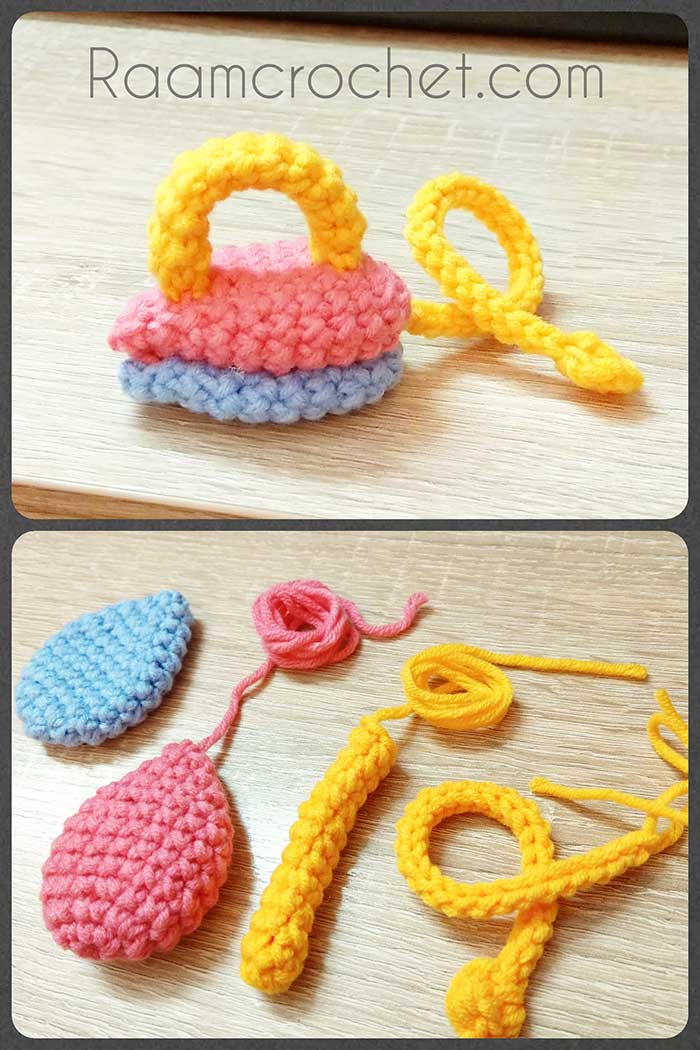
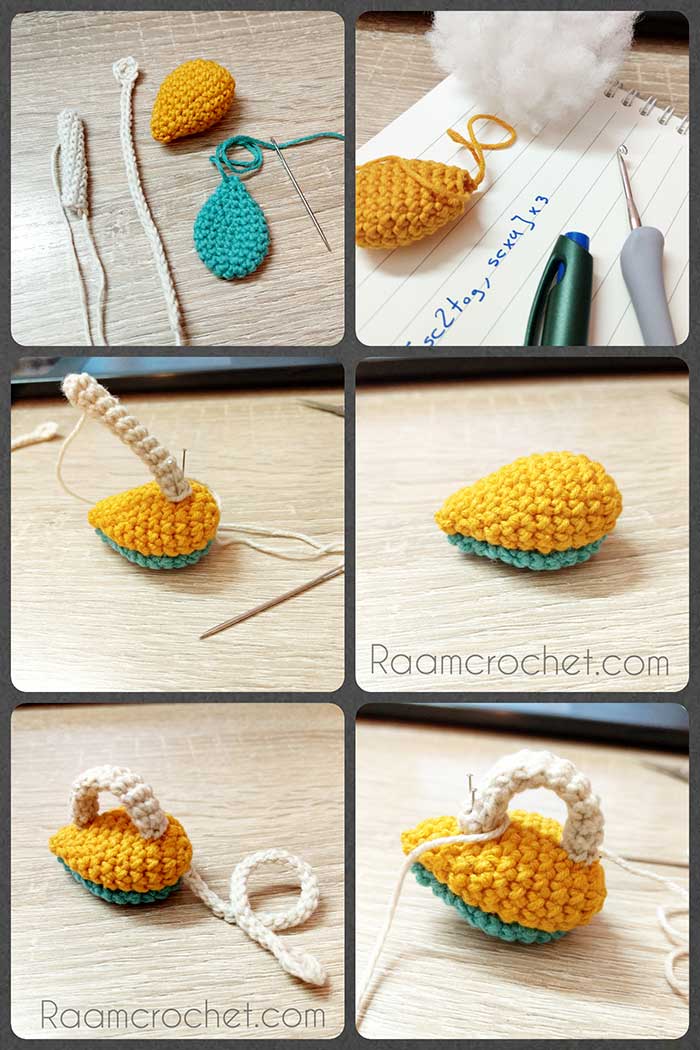
The pattern contain four parts, the lower plate, middle part, handle and cord.
Lower plate
Do not stuff this part.
Rnd 1: MR, 6 sc. (6 sc)
Rnd 2: 2 sc in each st. (12 sc)
Rnd 3: *2 sc, sc* repeat. (18 sc)
Rnd 4 – 7: Sc in each st. (18 sc)
Rnd 8: *Sc2tog, sc in each of next 4 sts* repeat 3 times. (15 sc)
Rnd 9: *Sc2tog, sc in each of next 3 sts* repeat 3 times. (12 sc)
Rnd 10: *Sc2tog, sc in each of next 2 sts* repeat 3 times. (9 sc)
Rnd 11: *Sc2tog, sc* repeat 3 times. Sl st at the end. (6 sc)
FO and weave in all ends. Do not stuff.
Middle part
Use same pattern as the lower plate but do stuff it lightly before finishing. FO leaving a tail for sewing.
The handle
Rnd 1: MR, 6 sc. (6 sc)
Rnd 2 – 12: Sc in each st. Sl st at the end of last round. (6 sc)
FO leaving long tail for sewing. Do not stuff.
The cord
Ch 33, (2 dc) cluster st 3rnd ch from the hook, ch 2, sl st same st as cluster st, sl st in each of the remaining chains. FO leaving long tail for sewing.
Finishing
Sew the middle part on top of the lower plate.
Sew one end of the handle on the third round of the middle part.
Sew the other end of the handle on the 11th round of the middle part.
Sew the cord at the back of the iron.
You’re done!
Share your final products with us at #raamcrochet on any social media.
List of free English crochet patters
Terms of Use Contact Us