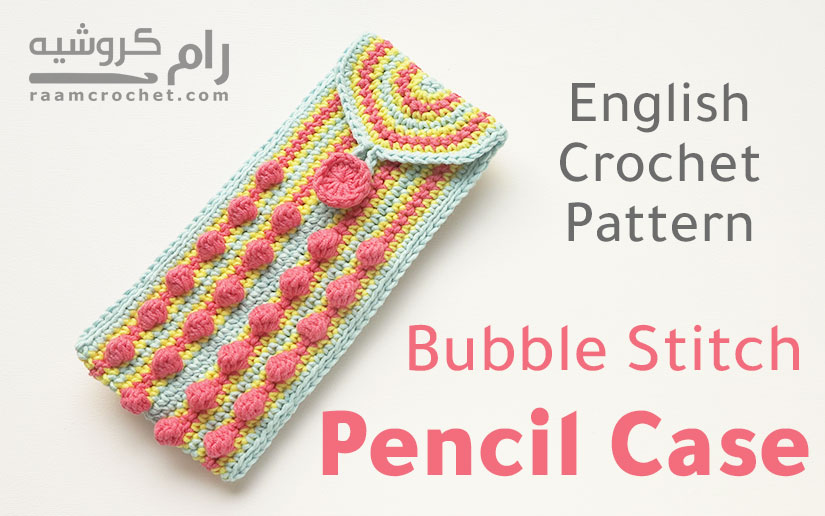
Finally finished writing my pattern for crochet bubble stitch pencil case. I realized that a lot of my followers liked this kind of projects and decided to make new one with new stitch, and here it is. The cool thing about this crochet case that you can use puff stitch instead of bubble stitch with little adjustment.
Designer: Nada
Skill level: Intermediate
Size: One size
Materials
I used kartopu pamuklu bebe yarn with 4 mm crochet hook (3 colors of your choice)
You can use any similar yarn
Needle
Button (optional if you don’t want the crocheted one)
Terms
st – stitch
sl st – slip stitch
ch – chain
sc – single crochet
dc – double crochet
Bubble stitch – (5 dc bubble stitch) / or Puff stitch – (5 YO puff stitch)
FL – front loop only
Special terms
Invisible slip stitch/Invisible join
Notes
We’ll be working on rounds. Do not Turn until the end when we close the sides.
We’ll use three colors, 1, 2 and 3.
You can use a plastic or wood button instead of the crocheted one.
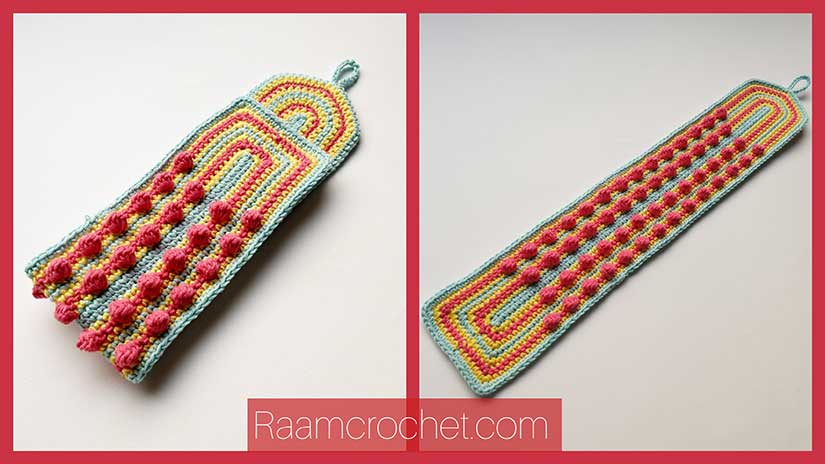
The pencil case will be a long rectangle with one rounded side.
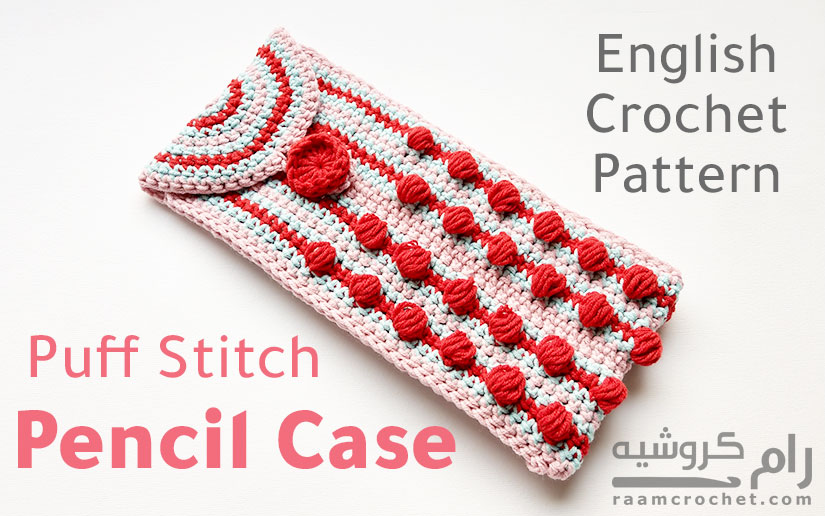
Bubble stitch or Puff stitch
In the instructions I mentioned how to crochet with the bubble stitch, and if you want to use the puff stitch instead all you need to do is replace every bubble stitch with a puff stitch with one additional condition. Do not count the chain we use to close every puff stitch as a stitch and do not crochet in it the next rounds.
Directions
Rnd 1: Color 1, ch 71, sc 2nd ch from the hook, sc in each stitch, 3 sc last st, do not turn, we’ll be working on the other side of the beginning chs, sc in each st, 2 sc last st.
Rnd 2: Color 2, sl st, ch 1, 3 sc same st, sc in each of next 68 sts, 2 sc in each of next 3 sts, sc in each of next 68 sts, 3 sc, sc next st.
Rnd 3: Color 3, sl st, ch 1, sc same st, 3 sc, sc in each of next 9 sts, *bubble stitch, sc in each of next 3 sts* repeat 13 times,
Sc in each of next 8 sts, *2 sc, sc* repeat 3 times, sc in each of next 12 sts, *bubble stitch, sc in each of next 3 sts* repeat 13 times, sc in each of next 5 sts, 3 sc, sc in each of next 2 sts.
Rnd 4: Color 2, sl st, ch 1, sc same st, sc, 3 sc, sc in each of next 70 sts, *sc in each of next 2 sts, 2 sc* repeat 3 times, sc in each of next 70 sts, 3 sc, sc in each of next 3 sts.
Rnd 5: Color 1, sl st, ch 1, sc same st, sc in each of next 2 sts, 3 sc, sc in each of next 71 sts, *2 sc, sc in each of next 3 sts* repeat 3 times, sc in each of next 71 sts, 3 sc, sc in each of next 4 sts.
Rnd 6: Color 2, sl st, ch 1, sc same st, sc in each of next 3 sts, 3 sc, sc in each of next 72 sts, *sc in each of next 4 sts, 2 sc* repeat 3 times, sc in each of next 72 sts, 3 sc, sc in each of next 5 sts.
Rnd 7: Color 3, sl st, ch 1, sc same st, sc in each of next 4 sts, 3 sc, sc in each of next 11 sts, *bubble stitch, sc in each of next 3 sts* repeat 14 times,
Sc in each of next 6 sts, *2 sc, sc in each of next 5 sts* repeat 3 times, sc in each of next 10 sts, *bubble stitch, sc in each of next 3 sts* repeat 14 times, sc in each of next 7 sts, 3 sc, sc in each of next 6 sts.
Rnd 8: Color 2, sl st, ch 1, sc same st, sc in each of next 5 sts, 3 sc, sc in each of next 74 sts, *sc in each of next 6 sts, 2 sc* repeat 3 times, sc in each of next 74 sts, 3 sc, sc in each of next 7 sts.
Rnd 9: Color 1, sl st, ch 1, sc same st, sc in each of next 6 sts, 3 sc, sc in each of next 75 sts, 2 sc, sc in each of next 7 sts, 2 sc, sc in each of next 4 sts,
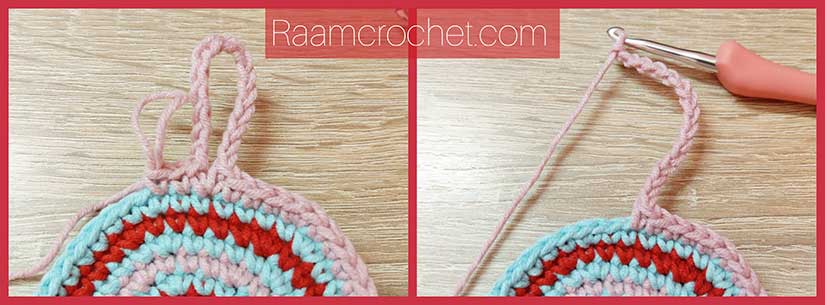
We’ll work the button loop by crocheting number of chains the size of your button. (I made ch 15), sc same st as last sc, sc in each of next 11 sts,
Sc in each of next 75 sts, 3 sc, sc in each of next 8 sts. FO and weave in ends.
Button
Rnd 1: Color 3, MR, ch 2 (not st), 12 dc, sl st in first dc. (12 dc)
Rnd 2: Sl st FL in each sc around, invisible sl st at the end. FO leaving long tail for sewing.
Closing the sides
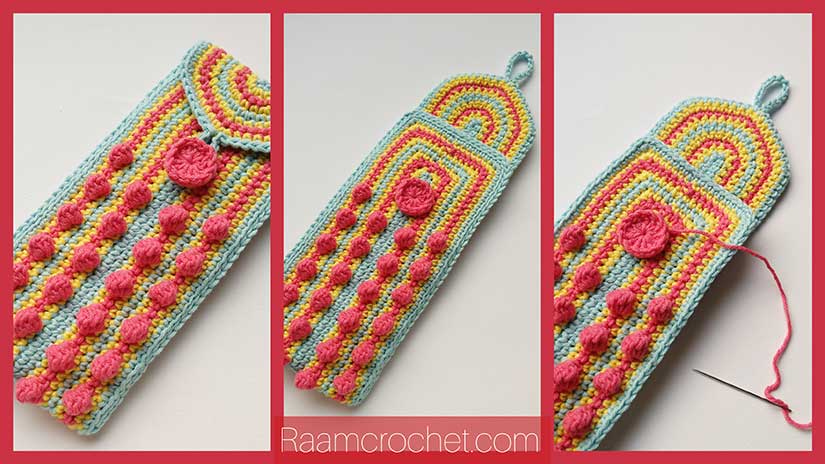
We’ll close the sides using a slip stitch as shown below:
* Count 6 bubble stitch (or puff stitch) from the straight edge up and fold there as you see above.

* Starting with right side of the case, start crocheting sl st through both layers using one loop of each. (pic 1)
* Stop when you reach the straight edge.
* Working in the straight edge alone, complete sl st FL until you reach the left side. (pic 2)
* Close the left side using same steps as the right side. (pic 3)
* FO and weave in all ends.
Sewing the button
Share your final products with us at #raamcrochet on any social media.
List of free English crochet patters
Terms of Use
Contact Us
تعليقين على “Crochet Bubble Stitch Pencil Case”
Helu awi! <3
شكراً