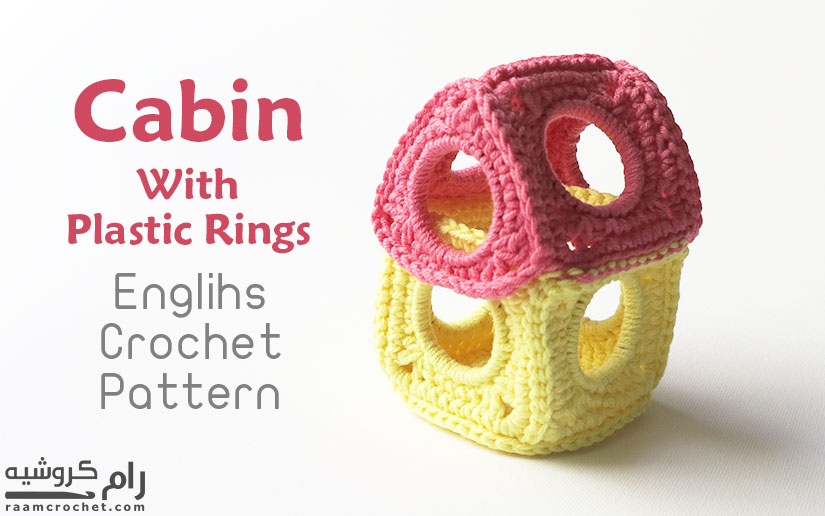
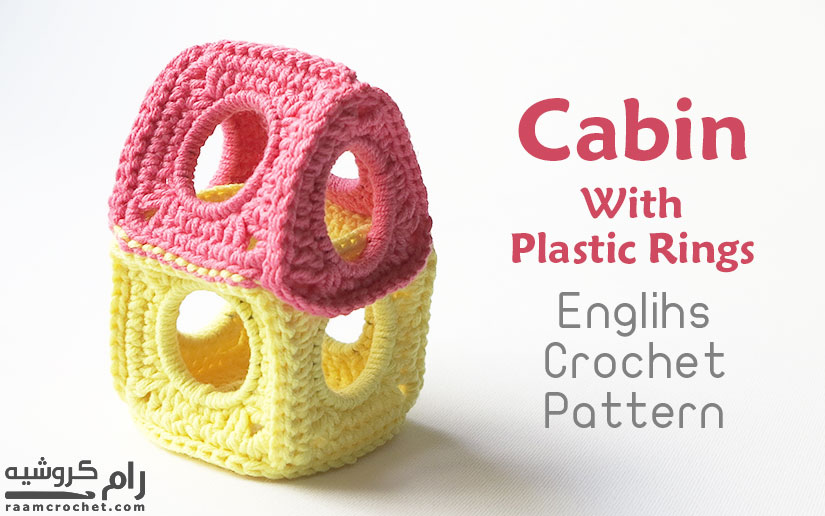
Very unique pattern that I’ll share with you today. This week we have crochet cabin using plastic rings. I had cute results that is perfect for decorations, toys or gifts. It was very fun to make.
Designer: Nada
Skill level: Easy / Intermediate
Size: Free
Materials:
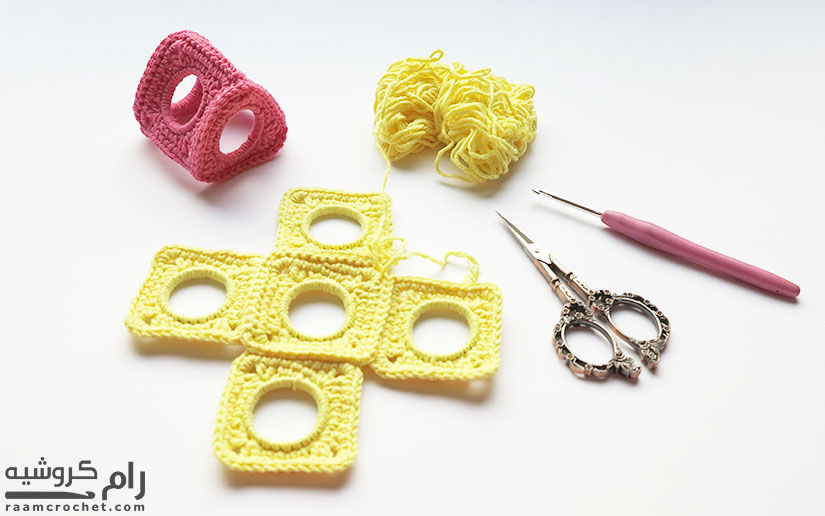
I used pamuklu bebe yarn (two colors) with 3.5 crochet hook
9 Small plastic rings from water bottle (the ones that under the cap).
Needle
Terms:
MR – Magic ring
st – stitch
sl st – slip stitch
ch – chain
sc – single crochet
hdc – half double crochet
dc – double crochet
Special terms:
Invisible slip stitch/Invisible join
Notes:
We’ll be using 9 plastic rings for the cabin. 5 for the bottom half and 4 for the upper half.
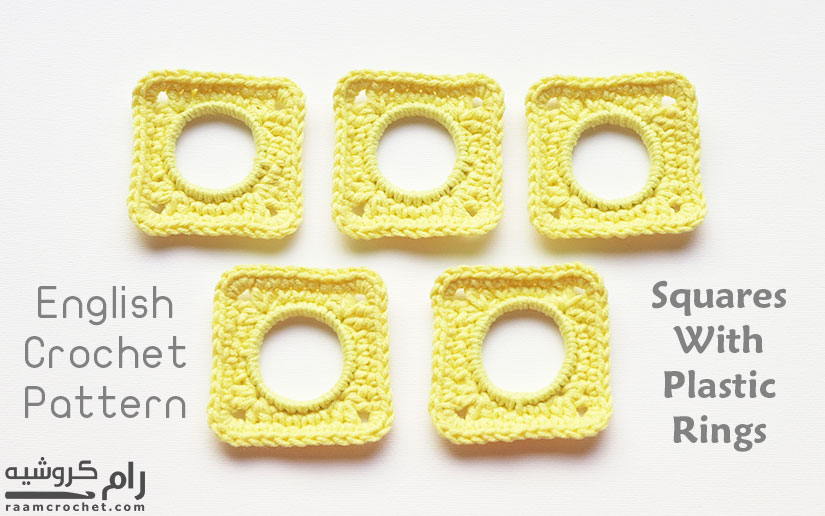
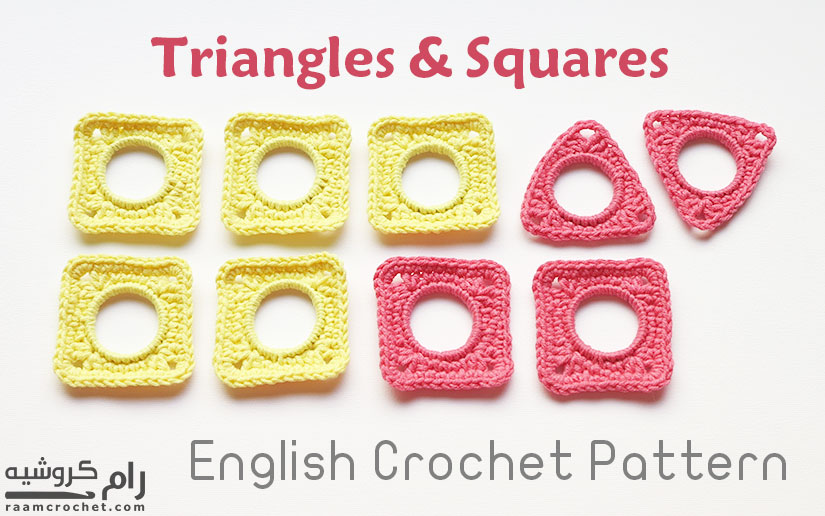
We’ll crochet squares and triangles. 5 squares for the bottom half and 2 squares + 2 triangles for the upper half.
Directions:
We’ll have square pattern and triangle pattern. Make 5 squares using the bottom of the cabin color. Make 2 squares and 2 triangles using the top of the cabin color.
Squares
I used the same pattern as the car I shared before with an additional round to make the square larger.
Rnd 1: Slip knot, 28 sc around the plastic ring.
Rnd 2: Sc in each of the next 2 sts, skip next st, [2 hdc, ch 2, 2 hdc] next st, skip next st.
*Sc in each of next 4 sts, skip next st, [2 hdc, ch 2, 2 hdc] next st, skip next st* repeat 3 times.
Sc in each of next 2 sts.
Rnd 3: Sc in each of next 4 sts, 4 sc next ch sp.
*Sc in each of next 8 sts, 4 sc next ch sp* repeat 3 times.
Sc in each of next 4 sts. Sl st or invisible sl st. FO and weave in ends.
Triangle
I used the medium size that I shared in this post.
Attaching parts together
• To attach the parts together we’ll use the slip stitch that goes through one loop of each side (the outer loops)
• Attach the bottom parts together and the upper parts together.
• To make the bottom part of the cabin attach 4 squares to the base one then slip stitch the side of the cabin.
• To make the upper part of the cabin, attach 2 squares to one of the triangles then attach the other side to other triangle. Slip stitch the upper edge.
• To attach the upper part of the cabin to the bottom part, sl st a long side the two squares of the upper part to the squares of the other side of the bottom part.
• Do not sl st or attach the triangles to the squares under them because they don’t match.
• Your cabin is done!
Share your final products with us at #raamcrochet on any social media.
List of free English crochet patters
Terms of Use
Contact Us
تعليقين على “Crochet Cabin Using Plastic Rings”
مرحبا
انا من معجبي باعمال رام كروشيه احيكى ندي على هذا المجهود.
ملاحظه : ارجو روية الخطوات من البدايه المربع كيف يصنع والمثلث للمجسم المنزل .وشكرا
أهلاً يا أم حسن وشكراً على الكلمات الطيبة.
إن شاء الله أصور الخطوات وأضعها في الانستقرام وهنا.