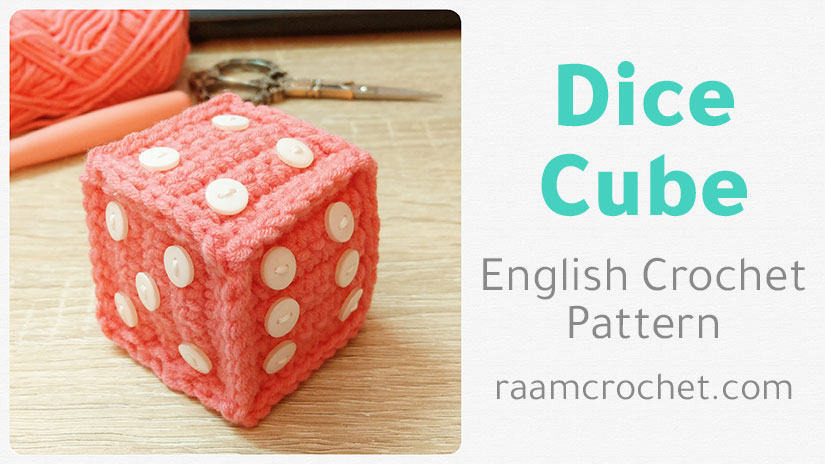
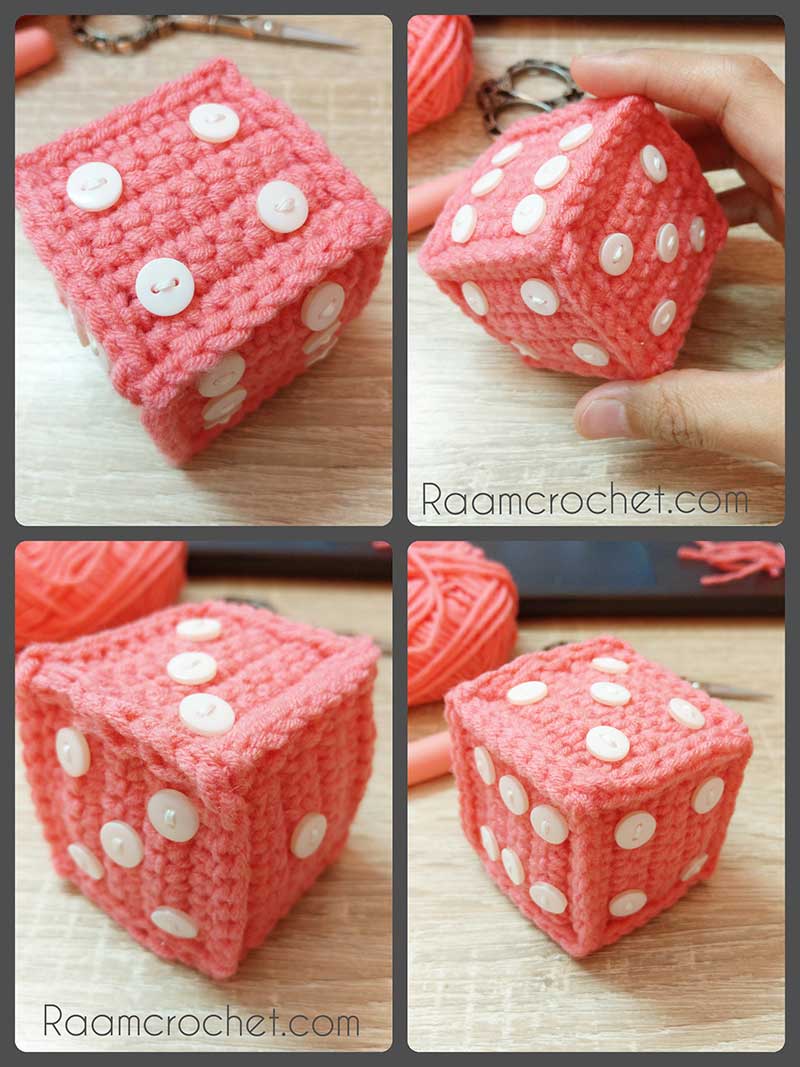
Try this unique crochet dice cube pattern. It’s easier than what you’d think. Have fun with buttons or beads you choose.
Designer: Nada
Skill level: Intermediate
Size: Free
Materials
Any kind of yarn that suites amigurumi and toys with suitable crochet hook
Needle
Stuffing
21 buttons or beads or circles of felt fabric
Needle and thread to sew the buttons
Terms
st – stitch
sl st – slip stitch
ch – chain
sc – single crochet
BL – back loop only
FL – front loop only
Notes
We’ll crochet two rectangles, do not FO after the 2nd one.
We’ll sew the buttons before forming the cube.
To form the cube we’ll use the slip stitch co connect the two rectangles.
Crochet Dice Cube
Directions
Work two rectangles using the following pattern. Do not FO after making the second one and complete with the joining instructions.
R 1: Ch 9, sc 2nd ch from the hook, sc in each st. (8 sc)
R 2 – 8: Ch 1, turn, sc in each st. (8 sc)
R 9: Ch 1, turn, sc BL in each st. (8 sc)
R 10 – 16: Ch 1, turn, sc both loops in each st. (8 sc)
R 17: Repeat R 9
R 18 – 24: Repeat R 10. FO.
Repeat same steps for the second rectangular but do not FO.
Sewing the buttons
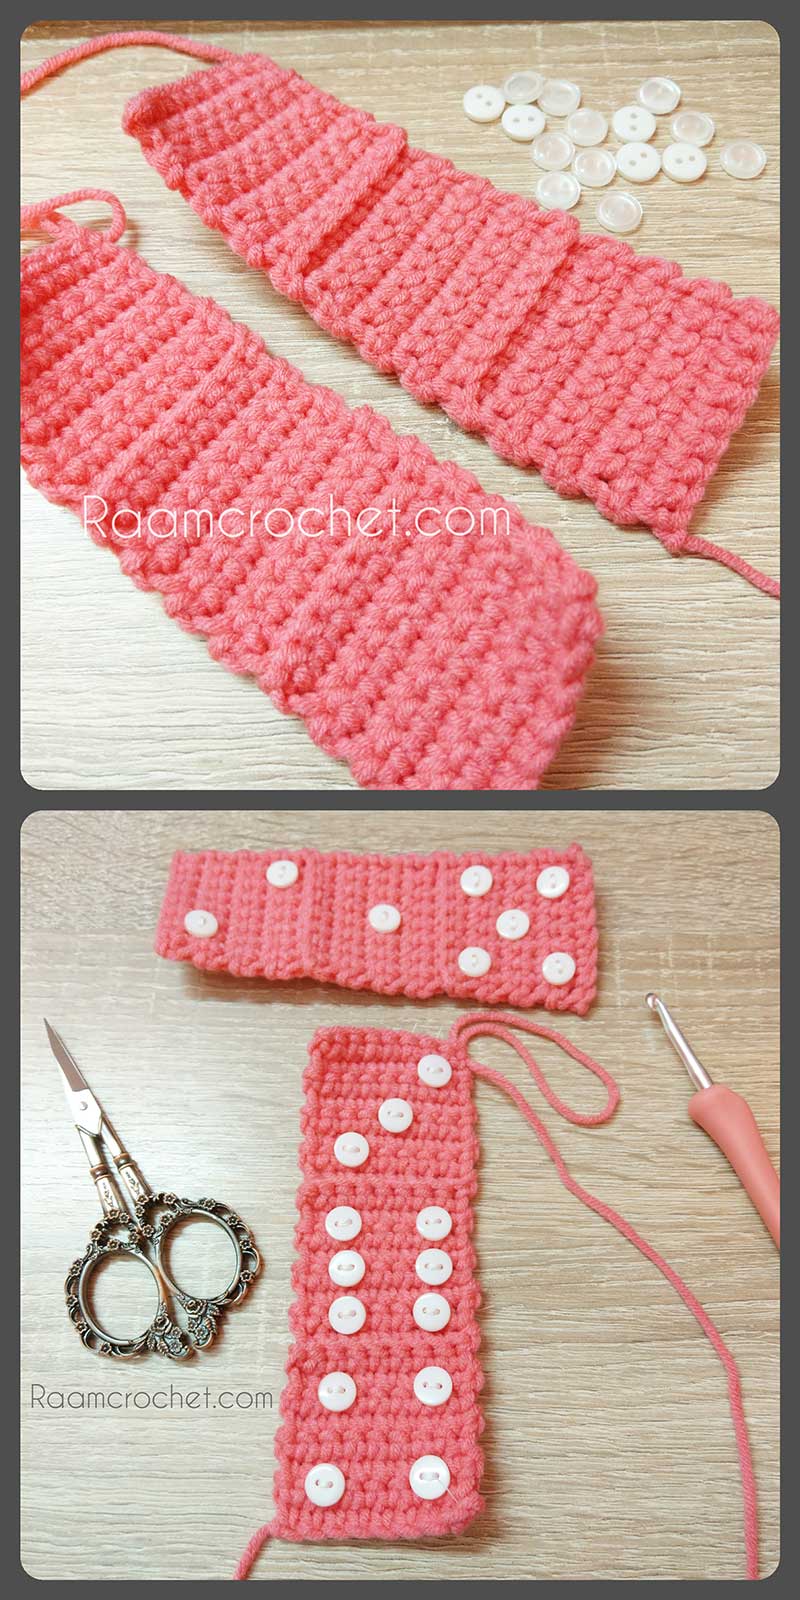
Sew the buttons on the right side using the same order as shown in the pic below.
The right side is the one with the visible edge between the squares.
No need to weave in the ends of the sewing threads, just keep it on the WS.
Joining
Notes before joining
We’ll use slip stitch and make sure it’s a little bet loose.
When we’ve two loops int’s better to use the inner loops for joining.
When joining edges make sure they’re not from the same rectangular.
We’ll joining with slip stitch continuously from beginning to end.
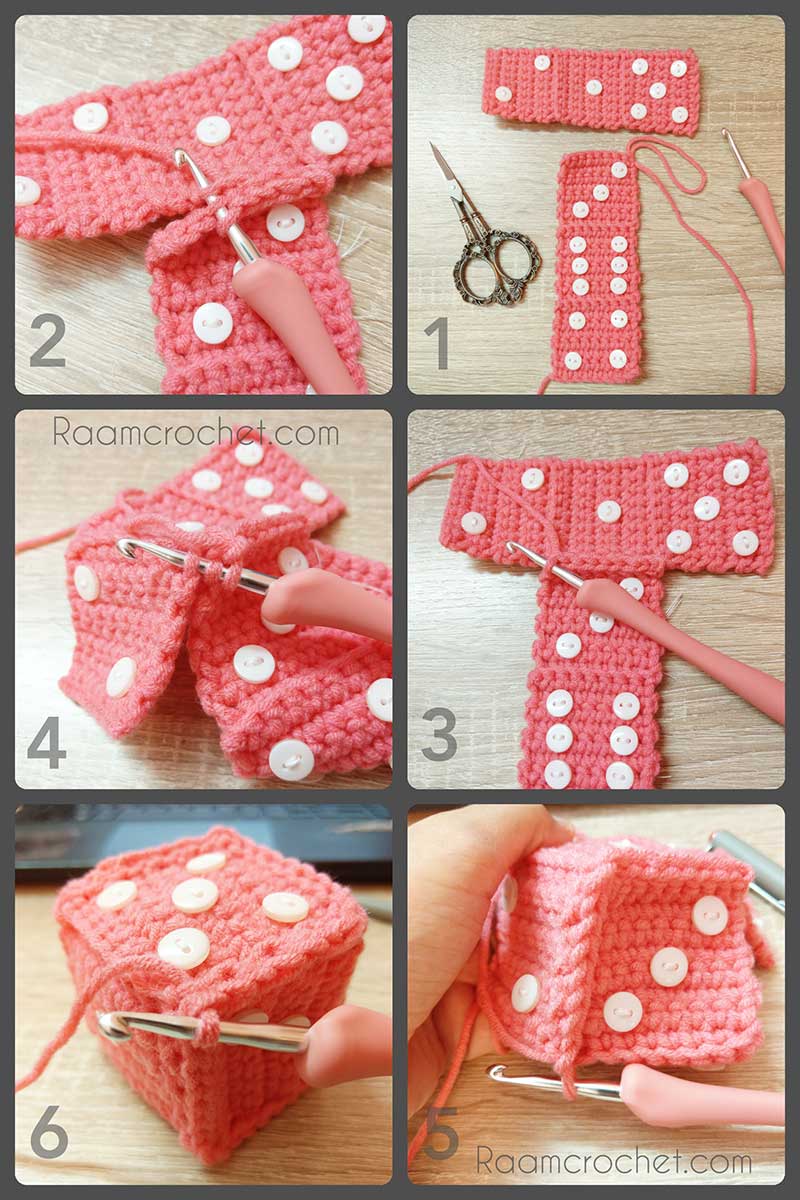
Joining steps
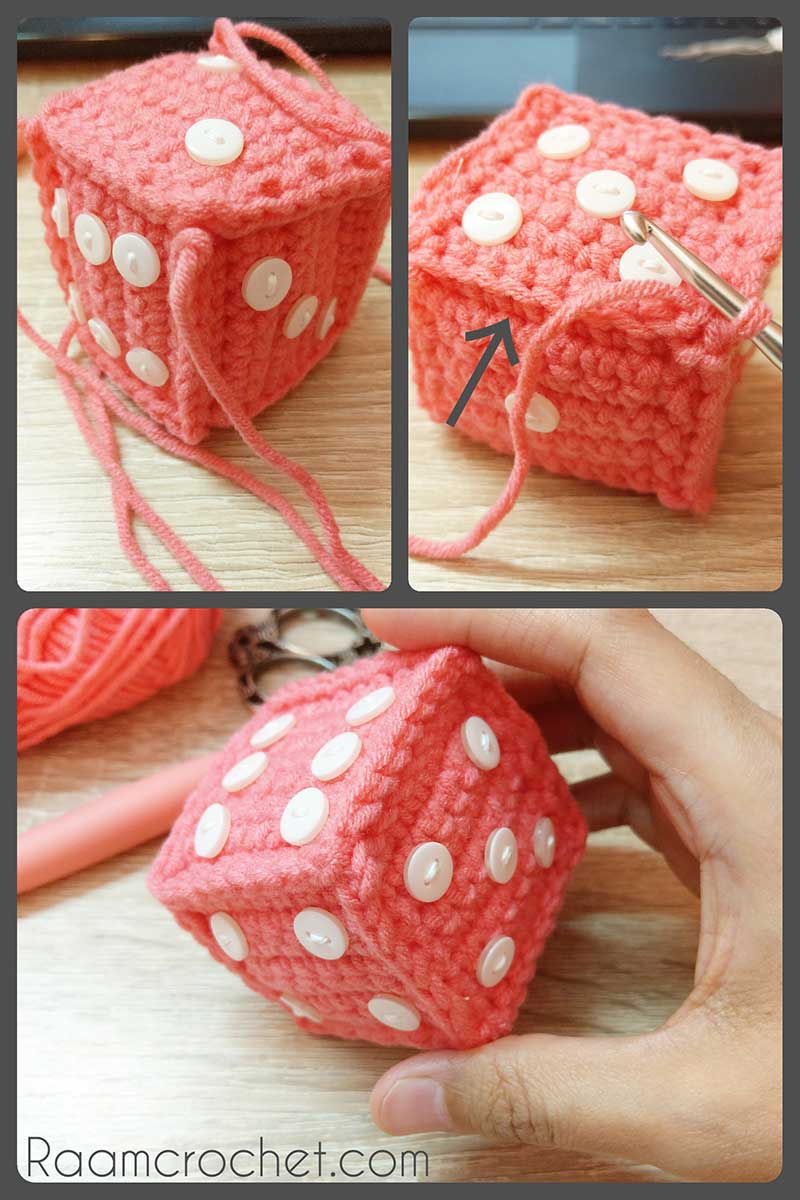
After crocheting the 2nd rectangular make ch 1 and turn. (Pic 1)
Place the rectangles as shown in the pic making sure the working piece is the one near you. (Pic 1)
Start joining by slip stitching loosely using one loop of each edge. (Pic 2 – 3)
After finishing first edge, ch 1, and complete with the next edge. (Pic 4)
Make sure to make a ch 1 after each edge.
Repeat same steps until you reach last edge.
Stuff the cube and complete closing the last edge. (Pic 6)
Do not FO and read the after joining notes.
After joining notes
You’ll realize that the other edges of the cube that we didn’t need to join are less visible and do not have the sharp seam, so I went over it with slip stitch to have the visible edges same as others.
Crochet slip stitch a log the other edges (4 edges). Some times you’ll need to FO and join to complete your stitches.
FO and wave in all ends. Your Dice Cube is done!
Share your final products with us at #raamcrochet on any social media.
List of free English crochet patters
Terms of Use
Contact Us